Earthquake Finder

This program can be used to obtain the earthquake information from various sources. The user can search for any event for given time range, magnitude range, depth range, geographical area. It can also obtain the focal mechanism solutions for the given parameters. It gives the output file (catalog.txt by default) where all the information is stored. It also plots the output (both with the focal mechanism and without it.)
This program makes use of the obspy module of Python and retrieve data from the International Seismological Center (ISC) server

Examples:

to run with default parameters

python3 earthquakeFinder.py

to obtain the earthquake info between today, March 2016 to the current time

python3 earthquakeFinder.py st=2016/3

to obtain the earthquake info between 2016, march, 29 to 2016, september, 22

python3 earthquakeFinder.py st=2016/3/29,et=2016/9/22

to obtain the catalog for magnitudes between 4-9 and with focal mechanism

python3 earthquakeFinder.py mxmag=9,mnmag=4,fm=yes

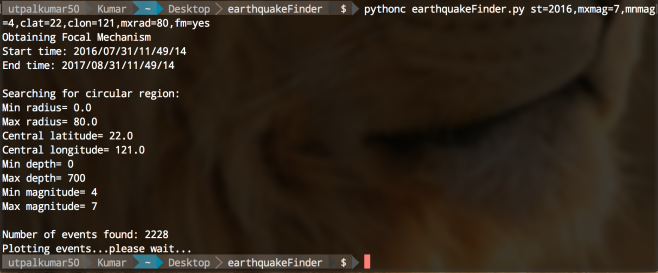
to obtain catalog for magnitude 4-7, and within radius of 10 (default) and central coordinates 22(lat),121(lon) with focal mechanism

python3 earthquakeFinder.py mxmag=7,mnmag=4,clat=22,clon=121,mxrad=80,fm=yes

focalmechanismcircularsearch

Parameters to change (default values in the braces):

mnla(-90),mxla(90),mnlo(-180),mxlo(180),mndep(0),mxdep(700),mnmag(4),mxmag(10),mnrad(0),mxrad(10),clat(None),clon(None),st(-1 month),et (current time),fm(no)

Output format of the catalog

Without Focal Mechanism -> “YEAR MONTH DAY HOUR MINUTES SECONDS LONGITUDE (in deg) LATITUDE(in deg) DEPTH(in km) MAG_TYPE MAG EVENT_NAME.”

With Focal Mechanism -> “YEAR MONTH DAY HOUR MIN SEC LONGITUDE LATITUDE DEPTH EXP(Nm) M0 MAG Mrr Mtt Mpp Mrt Mtp Mpr Str1 Dip1 Rake1 Str2 Dip2 Rake2.”

Requirements

  1. Python 3: Can be obtained from here.
  2. Extra Modules
    (a) requests: pip install requests
    (b) pandas: pip install pandas
    (c) obspy: pip install obspy
    (d) basemap: It is a great tool for creating maps using python in a simple way. The best way to obtain basemap is via Anaconda/MinicondaFor Linux/Mac users just download the bash installer and inside the download directory, execute the following command: bash Miniconda*.sh

    For Windows user, download the exe file and install it. After the installation of Anaconda/Miniconda, basemap can be obtained by simply executing the command conda install basemap


Click here
to download the programs.


Program for extracting the earthquake informations

Introduction

Often in seismology, we require the information about the earthquake such as location, origin time, depth, magnitude, etc. To obtain this information, users generally, browse the web or if he/she is experienced then just go to the predetermined sites such as global CMT catalog. Even, after reaching the correct website, we need to do some dig up to get the desired information. This program is meant to scrape the global CMT website to obtain the earthquake information.

How to obtain the program

You can download the package from here.

How to use the program

The package you download from the given site consists of two python programs. These programs require pre-installed python-3.

You can obtain python from the following websites:
1. Python software
2. The user can also download the python package anaconda

After installing the python 3, to run the program, type:
python3 EQinfo_extractor.py
Then enter the event recognition parameter such as
1976,3,8,4,39
And enter. It will prompt the event information.

Screen Shot 2017-08-27 at 10.07.05 PM

Using the program as a module

You can also use the package as a python module. For using it as a module, save the program in the current directory or in the computer-discoverable path.
import EQinfo_extractor as eq_ext
eq_ext.eventinfo(1976,3,8,4,39)

Download Earthquake Catalogs from Global CMT website

In seismology, we always need to download and check the event information about the events. This python script can download the event catalog from the website to the local computer for the given range of time.

Running this program is very simple:
Screen Shot 2017-08-25 at 11.47.09 PM.png

The user just needs to input the time range for the earthquakes e.g., 2000/05-2009/08.


Requirements: Python 3

To download the program, please click here.

Calculating Auxiliary Fault Plane Solutions given the main fault (Fortran)

We have calculated the auxiliary fault plane solution using the input of main fault solution in perl. Here, we do the same in Fortran. And we will also plot to solution to visualize the results.

Fortran Code to get the auxiliary fault plane solutions:

program auxiliary_fault_plane
! Program to calculate the strike, dip and rake of the auxiliary fault plane solutions
! given the strike, dip and rake of the fault plane.
! Authors: Utpal Kumar, Li Zhao
        implicit none
        real (kind=8):: ph1,del1,lb1,ph2,del2,lb2,sinlb2,coslb2,sinph1_ph2,cosph1_ph2,ph1_ph2,phI,delI,lbI
    real, parameter :: pi = 2*asin(1.0)
    integer :: n,lbsgn

        print *, 'Enter strike, dip and rake respectively of the fault plane (in degrees) (e.g., 40,50,60):'
        read *, ph1,del1,lb1
        !ph1=40
        !del1=80
        !lb1=200
        phI=ph1
    delI=del1
    lbI=lb1
        !Converting the strike, dip and rake in radians
        ph1=ph1*pi/180  !strike
        del1=del1*pi/180        !dip    
        lb1=lb1*pi/180          !rake   
        
        !Adaptation to include the negative values of rake
        lbsgn=1
        if (lb1 < 0) then
                lbsgn=-1
        end if
        
        
        ! Calculation of Strike, sip and rake of the auxiliary fault plane
        del2=acos(sin(lb1)*sin(del1))   !dip of auxialiary fault plane
        sinlb2=cos(del1)/sin(del2)
        coslb2=-(sin(del1)*cos(lb1)/sin(del2))
        lb2=acos(coslb2)        !rake of auxilairy fault plane
        sinph1_ph2=cos(lb1)/sin(del2)
        cosph1_ph2=-1/(tan(del1)*tan(del2))
        ph1_ph2=acos(cosph1_ph2)

        !Checking for the quadrant of the strike angle
        if (sinph1_ph2 >= 0 .and. cosph1_ph2 >=0) then
        ph1_ph2=ph1_ph2
        else if (sinph1_ph2 > 0 .and. cosph1_ph2 < 0) then
        ph1_ph2=ph1_ph2
        else if (sinph1_ph2 < 0 .and. cosph1_ph2 < 0) then
        ph1_ph2=-ph1_ph2
        else if (sinph1_ph2 < 0 .and. cosph1_ph2 > 0) then
        ph1_ph2=-ph1_ph2
        end if
        
        ph2=ph1-ph1_ph2         !strike of auxialiary fault plane
        
        ! For dip > 90 degrees and less than 180 degrees
        if (del2 > pi/2 .and. del2 < pi) then
        ph2= pi + ph2
        del2= pi - del2
        lb2= 2*pi - lb2
        end if
        
        if (lbsgn < 0) then
                lb2 = -(2*pi - lb2)
        end if
        
        !Adaptation to give the strike value in the range of 0 to 360 degrees
        if (ph2 > 2*pi) then
                ph2 = ph2 - 2*pi
        end if
        
        101 format("The strike of the auxiliary plane is: ",f9.4, " degrees")
        102 format("The dip of the auxiliary plane is: ",f9.4, " degrees")
        103 format("The rake of the auxiliary plane is: ",f9.4, " degrees")
        print 101, ph2*180/pi
        print 102,  del2*180/pi
        print 103, lb2*180/pi
    open(unit=10,file='plt.dat')
    10 format("25  25   0 ",  f8.2, f8.2, f8.2, f8.2, f8.2, f8.2," MainFault: ",f7.2,"/",f7.2,"/",f7.2, &    !continuation of line
        " AuxFault: ",f7.2,"/",f7.2,"/",f7.2)
        write(10,10) phI,delI,lbI,ph2*180/pi, del2*180/pi, lb2*180/pi, phI,delI,lbI,ph2*180/pi, del2*180/pi, lb2*180/pi !writing in the file
end program auxiliary_fault_plane

Then we save this in the file called “auxiliary_fault_plane.f”. This script basically aim for calculation of the fault plane solution. For visualizing the results, we can execute the program and plot the results using the psmeca command of GMT.

The bash script for compiling and executing the above program and then plotting it is following:

#!/bin/bash
gfortran -ffree-form auxiliary_fault_plane.f -o auxiliary_fault_plane
./auxiliary_fault_plane
psbasemap -Bwsne -R0/50/0/50 -Jm1.0 -Xc -Yc -P -K >output.ps
echo "24.6 30 20 0 2 MC Focal Mechanism Plot"| pstext -Jm -R -K -O -P -N >>output.ps
psmeca plt.dat -Jm -R -Sa0.40/14/-0.2i -Gbrown -Fa0.2c/cd -Egray -P -O -N -L -V >>output.ps

gs output.ps
ps2pdf output.ps

The P axis is plotted using circle and T axis using the diamond symbol (-Fa0.2c/cd).

Screenshot from 2016-12-05 14-34-26.png

output1

-Utpal Kumar (IES, Academia Sinica)

Moment Tensor Calculations

Programs:
1. moment_tensor_calc2.pl –> it calculates the moment tensor matrix for given M0, strike, dip and rake
2. diagonalizing_matrix.pl –> this program diagonalizes the given matrix. It can be used to diagonalize the moment tensor matrix as well.
3. iso_dev_mt.pl –> it gives the isotropic and deviatoric part for a given moment tensor matrix
4. maj_min_dc.pl –> this gives the major and minor double couple as output.
5. dc_clvd_mt.pl –> this gives the double couple and clvd part as output.
6. focal_mech_info.pl –> this gives the auxiliary fault plane as output for a given main fault plane.
7. plot_focal_mech.sh –> this bash script plots the focal mechanism solution for a given strike, dip and rake. It makes use of the focal_mech_info.pl program.
Example Focal Mechanism Plot for:
Main Fault
Strike = 40 degrees
Dip = 50 degrees
Rake = 60 degrees
Click here for the plot
test

Continue reading Moment Tensor Calculations