We first need an account on the GitHub. You can sign up on the GitHub website .
Steps for starting a repository on Github:
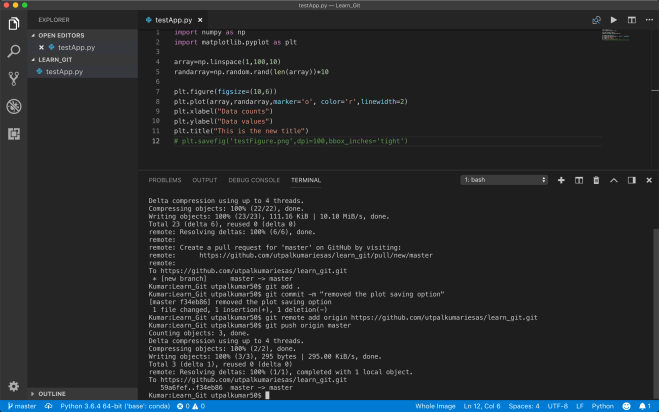
Now, we push the code from our master branch to the GitHub.
git status
git push https://github.com/utpalkumariesas/learn_git.git master
Now, let’s add some more changes to the master branch and push those changes to the GitHub. Before that, we can create an alias to the long address to the online repository of the GitHub so that we don’t need to type that again and again. Here, we use “origin” as an alias. git remote add origin https://github.com/utpalkumariesas/learn_git.git
Now, we can simply type git push origin masterto push the repository to the remote location on GitHub.
Cloning remote repository locally
We can instead do the other way round too. We can clone the online repository onto our local computer.
Collaborating on GitHub
The first thing we should make sure that we have the updated master code present locally. We can pull the code using the pull command in the cloned directory git pull origin master
Now, we made a new branch called complex_app and made some changes and commit those changes.
Now, we want to push this branch to the remote repository on the GitHub. We do not want to merge this with the master and then push to the remote GitHub repository as this will mess up the master branch on the GitHub. Later, all the collaborators can review the code and then decide if they wanna merge it or not.
Forking
We can fork the repo on GitHub in order to contribute to some open source project. The forking will copy the open source project from other’s account to our own account. After that, we can clone that repository to our local computer. Later if we wanna contribute to that project, we can do the pull request. And then if the original creator of the project accepts the pull request then they can merge it to the original project.
Heroku is a cloud platform supporting several programming languages. It allows a developer to build, run, and scale different applications. Heroku hosts its services on the Amazon’s EC2 cloud computing platform. The Heroku applications have a unique domain name “appname.herokuapp.com” which routes the run requests to the correct application containers or “dynos”.
For deploying an app on the Heroku server, we first need to install Heroku on the local computer. On Mac, just install using the Heroku and Git installer and it should do the job.
Now, I’d like to make the app using the Dash library of Plotly. This library makes the job of complex web coding quite smooth.
Make a directory and “cd” to that directory
Initialize the folder with git and a virtualenv. It is always a good idea to use separate environment for different projects.
virtualenv creates a fresh Python instance. We need to reinstall the app’s dependencies i.e. all the libraries required by the app we are making.
Let’s install all the dependencies:
Now, we initialize a folder with the app (app.py), a .gitignore file (to tell git what files in the directory to ignore), requirements.txt (tells heroku to install given packages), and a Procfile (for the command) for deployment.
For making the requirements.txt, we run
pip freeze > requirements.txt
After making all the above files, we can create the app on Heroku. The application is sent to heroku using either of Git, Github, Dropbox or via an API. Here, we will use Git.
heroku create utpal-dash-app
git add . #add all files to git
git commit -m 'Initial app to Heroku'
git push heroku master # deploy code to heroku
heroku ps:scale web=1  # run the app with a 1 heroku "dyno"
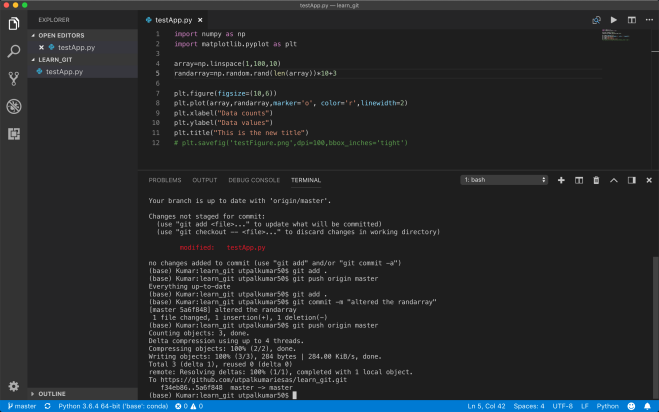
Update the code and redeploy
When we modify app.py with our own code, you will need to add the changes to git and push those changes to heroku.
git status # view the changes
git add .  # add all the changes
git commit -m 'a description of the changes'
git push heroku master
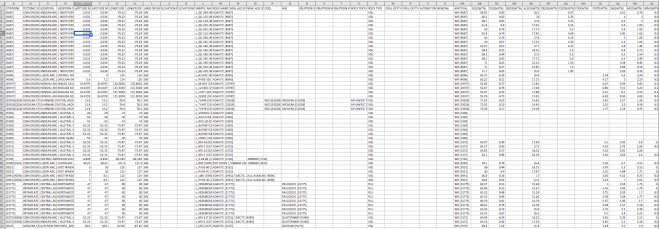
We download the precompiled data of adakite from GEOROC database.
For a simple impression of adakite, the wikipedia page gives some clue: Adakites are volcanic rocks of intermediate to felsic composition that have geochemical characteristics of magma thought to have formed by partial melting of altered basalt that is subducted below volcanic arcs.
In this example, we demonstrate how to use python to simplify the data, discard the null data, classify and plot the geochemical properties.
First, let’s look at the data, it is quite large and differs in the available data: some elements are there, some are not.
Now we can start by importing some useful packages:
… and then plot some elements using that function:
plt.figure(figsize=(12,12))plt.subplot(321)plot_harker(x=df["SIO2(WT%)"],xlabel=r'$SiO_2$ (wt%)',y=df["AL2O3(WT%)"],ylabel=(r'$Al_2O_3$ (wt%)'),title=r'$SiO_2$ vs $Al_2O_3$')plt.subplot(322)plot_harker(x=df["SIO2(WT%)"],xlabel=r'$SiO_2$ (wt%)',y=df["MGO(WT%)"],ylabel=(r'$MgO$ (wt%)'),title=r'$SiO_2$ vs $MgO$')plt.subplot(323)plot_harker(x=df["SIO2(WT%)"],xlabel=r'$SiO_2$ (wt%)',y=df["FEOT(WT%)"],ylabel=(r'$FeOt$ (wt%)'),title=r'$SiO_2$ vs $FeOt$')plt.subplot(324)plot_harker(x=df["SIO2(WT%)"],xlabel=r'$SiO_2$ (wt%)',y=df["TIO2(WT%)"],ylabel=(r'$TiO_2$ (wt%)'),title=r'$SiO_2$ vs $TiO_2$')plt.subplot(325)plot_harker(x=df["SIO2(WT%)"],xlabel=r'$SiO_2$ (wt%)',y=df["NA2O(WT%)"],ylabel=(r'$Na_2O$ (wt%)'),title=r'$SiO_2$ vs $Na_2O$')plt.subplot(326)plot_harker(x=df["SIO2(WT%)"],xlabel=r'$SiO_2$ (wt%)',y=df["K2O(WT%)"],ylabel=(r'$MgO$ (wt%)'),title=r'$SiO_2$ vs $K_2O$')plt.suptitle(r'Harker diagram of Adakite vs $SiO_2$',y=0.92,fontsize=15)plt.subplots_adjust(hspace=0.3)plt.show()
We can try to see the tectonic settings of the rock:
plt.figure(figsize=(8,8))tec=df['TECTONIC SETTING'].dropna()tec=tec.replace('ARCHEAN CRATON (INCLUDING GREENSTONE BELTS)','ARCHEAN CRATON')tec_counts=tec.value_counts()tec_counts.plot(kind="bar",fontsize=10)plt.title('Tectonic settings of Adakite')plt.ylim([0,500])plt.show()
The following code demonstrates how to create new columns and divide the data. We divide the data in High Silica Adakite (SiO2 > 60%) and Low Silica Adakite (SiO2 < 60%)
Git is a version control system for tracking changes in computer files. It was initially created by Linus Torvalds (creator of Linux system) in 2005.
We can use it to store any kinds of programs. It is distributed version control system. It means that many developers can work on the same project without being on the same network. It tracks each of the changes made to the files in the project. The user can revert to any file at any time of it had been committed to the repository. We can even look the snapshots of the code at any particular time in history. We can upload (or push) the files to the remote repository.
We can have a look at the configuration using the following command
git config --list
If you need any help, you can just type:
git help
Now, to add the files to the index and working tree (our final aim)
we use git add command git add filename.py
To add all the files in the current directory
git add .

git add *.html
We can get the information about the tracked and untracked files. Tracked files are those which have been added to the working directory.
git status
If we make any changes to the files, we can inspect the changes using the diff command
git diff
If we want to remove the file from the index (untrack the file), then we can simply type:
git rm --cached filename.py
To remove the files from the index and the working tree:
git rm filename.txt
If we want to rename the file then we can do it using the git command too. We don’t need to untrack the file and then rename the original file and add it again
git mv filname.txt newfilename.txt
Now, we can commit the files to add to our repository on the GitHub.
There are two ways of doing that:
1. First way opens the vi or default directory on the local computer, and the user is prompted to enter the message. It is safe to enter meaningful messages because it is useful to track the changes made to the file. git commit
2. The user can also enter the message using the -m flag git commit -m 'made some changes'
To make changes to the committed files, the command is –amend
git commit --amend
If we don’t want to include some files in the current directory into the index or working tree, we can add the name of those files in the .gitignore file.
touch .gitignore
We can obtain the log of the git actions
git log --pretty=oneline

We can make this better formatted

git log --pretty=format:"%h : %an : %ar : %s"

For all commits within a week

git log --since=1.weeks

For all commits since some given date

git log --since="2014-01-12"

All the commits of a given author

git log --author="utpalkumar"

All commits before a given date

git log --before="2014-04-30"
If we are a group of developers. We don’t wish to add any changes to the repository without finishing a particular sub-project. We can avoid that by working in a branch
To create a branch other the main branch (master) git branch mybranch
To switch to the new branch git checkout mybranch
We can make any change in this branch and merge these changes in the master branch, we need to first switch to the master
git checkout master
to merge the changes to the original file
git merge mybranch -m "added mybranch"
For adding files to the remote git repository, we need to make account on the Github website and then we need to start a new repository, name it, give some required details then, we can add files from our local repository to the remote repository using the following commands:
git remote add origin https://repositoryaddress.git

Replace the above fake URL with the URL you get from the repository you create on the Github website.

git push
If we want to add the same files to another repository, we need to remove the added remove origin using the command
git remote rm origin # to remove the remote origin
We can download the git directory by simply using the git clone command
In daily life as well as in doing research, we might come to problems that require a lowest/highest value of variables, e.g.: find the shortest way from home to work, buying household items with a fixed amount of money, etc. These problems could be called “optimization” and today we will introduce an algorithm to solve these kinds of problem: the Genetic Algorithm.
Genetic Algorithm has been developed by Prof. John Holland in 1975, which search algorithm that mimics the process of evolution. This method is based on the “Survival of the Fittest” concept (Darwinian Theory), i.e.: successive generations are becoming better and better.
II. Algorithm
Initialization
Fitness Calculation
Selection
Crossing Over
Mutation
Repetition of the steps from 2-5 for the new population generated.
The pdf version of this introduction could be found here: Genetic Algorithm
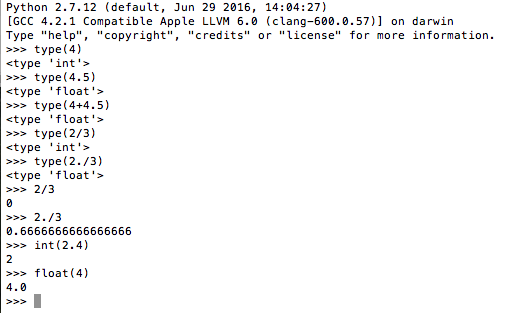
To check type of a variable, data, you can use function type(variable)
+ Numbers: most frequently use is float and int type. The float type uses decimal while the int rounds number. Below is the example of using these type of number. To convert to int and float type, we use int(variable) and float(variable). A number can take numeric operations like +(add), – (subtract), *(multiply), /(divide), % (modulo), ** (exponential)
+ Strings: any character information, that in between ‘ ‘ or ” “. Strings can be joined together by using + operation.
+ List: Python often uses compound data types, used to group together with other values. The most versatile is the list, which can be written as a list of comma-separated values (items) between square brackets. Lists might contain items of different types: numbers, string or list itself (a list of lists). This type is a basic type to analyze data in Python because it makes you able to access data with ordering.
II. Function and method
In Python,methods are associated with object instances or classes; functions aren’t. When Python dispatches (calls) a method, then it binds the first parameter of that call to the appropriate object reference. A function often has the form of function(argument) while an argument can be any kind of data type (number, string, list). A method must be associated with a type of object and often have the form of object.method(argument) with an object is the suitable type to do a method.
Let’s do some practice and take the list as an example.
The functions used in here are len (return the length of an object – how many objects in a list) and print (display an object on screen). The methods used in here are append(add an object to a list) and reverse (reverse the order of objects in a list).